Installing your own generator can be a great way to have backup power in the event of an outage. With some planning and preparation, installing a generator is a project many homeowners can tackle themselves. Here is a guide to the process of installing your own generator.
Choosing a Generator
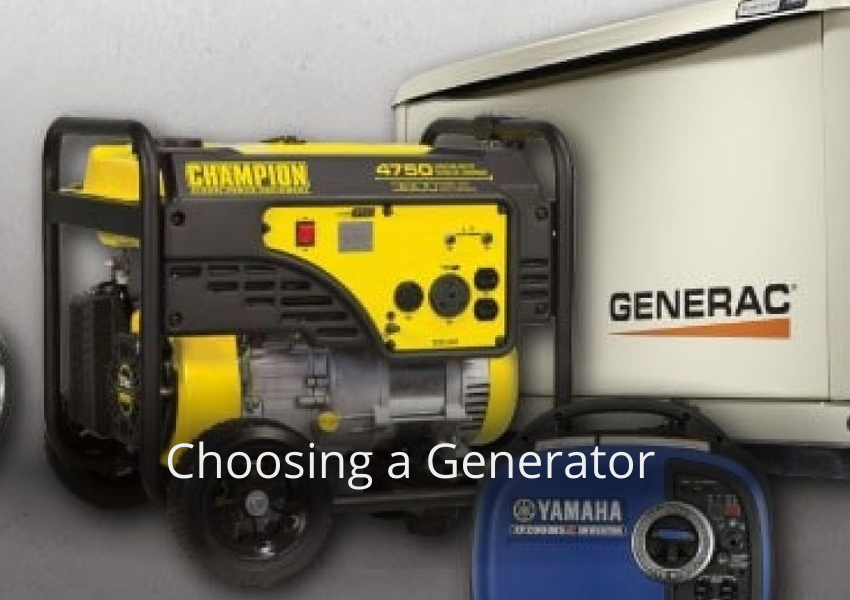
The first step is selecting the right generator for your needs. Consider the following:
- Power output
Select a generator that can handle the power needs of your critical appliances and devices. Take an inventory of what you want to power – lights, fridge, freezer, TV, etc. Then calculate the starting and running wattage requirements. Choose a generator with enough output capacity to handle the peak load. Allow for future increased power needs too.
- Fuel type
The most common fuel types for home generators are gasoline, diesel, propane (LPG), and natural gas. Gasoline and diesel offer portability and storage of fuel in tanks. Propane and natural gas run quieter but require fixed fuel line installations.
- Noise level
Gasoline generators tend to be louder than other fuel types which can be disruptive. Consider noise ordinances in your neighborhood and any close proximity neighbors. Soundproof generator enclosures can reduce noise.
- Budget
Generator costs range widely from a few hundred dollars for basic models and up to $5000+ for premium standby generators. Have a budget in mind before shopping so you get the right generator for your needs and finances.
Also read : Portable Generators – Can They Power Your Home?
Generator Placement
One of the most important factors in installing a generator is determining where to locate it. Some guidelines:
- Outdoor location at least 15-20 feet from your home, doors, and windows – improper indoor use can cause dangerous carbon monoxide poisoning.
- Allow ample clearance from vents, flammable materials, vegetation. Check your local fire code for required clearances.
- Locate away from rainfall, snow drifts, and sprinklers to prevent water damage.
- Consider proximity to fuel supply lines for natural gas and propane generators.
- Minimize generator noise disturbances to neighbors by locating away from homes if possible. Sound barriers also help reduce noise.
Transfer Switch Installation
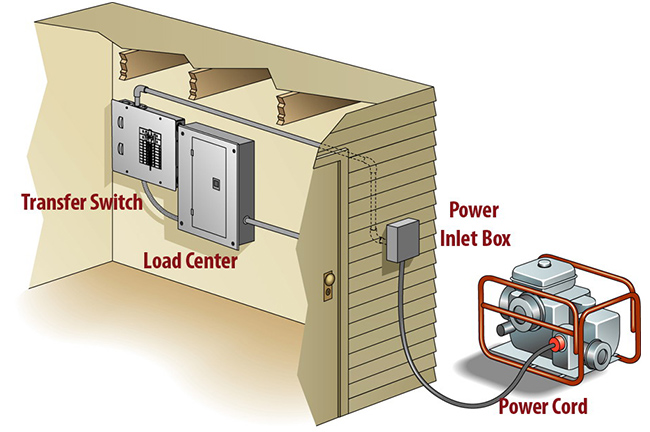
The transfer switch is a critical component that connects and safely transfers power from the generator to your home’s electrical panel to power your circuits. Hiring an electrician is highly recommended to properly install the transfer switch. If you want to DIY, take extreme care working with electrical components.
Choose between a manual transfer switch (MTS) or automatic transfer switch (ATS). ATS systems sense power outages and automatically switch to generator power. Manual transfer switches require someone to physically switch circuits over to the generator when there is an outage.
Installation steps include:
- Install the transfer switch near the main electrical panel according to its specifications.
- Wire the transfer switch to the generator.
- Connect circuits to the transfer switch per your planned critical load inventory.
- Connect the transfer switch to the utility electrical panel.
- Complete testing to ensure proper function.
Also read : Can I Run a Generator Without a Load?
Getting Permits (Local Codes and Regulations)
Most local jurisdictions require permits for generator and electrical installations to ensure they meet code. Check with your city permit office to get the right permits which may include:
- Electrical permit for the transfer switch wiring
- Mechanical permit for gas line or propane tank installations
- Building permit for permanent standby generators and structural modifications
Carefully review permit requirements and submit applications well in advance of installation. Inspection of the completed installation may be required before final sign off of permits.
Installing Gas and Propane Lines
One advantage of natural gas and propane generators is having the fuel source permanently plumbed to the unit. This avoids having to manually replenish fuel. Consult your generator specifications for fuel line requirements.
Natural gas line installation is best left to professionals. Contact your utility company to assess new gas line requirements and install the supply line.
For propane, you may be able to DIY the propane fuel line install:
- Determine the required pipe diameter and copper tubing or stainless steel flex line needed.
- Install a sediment trap just before the generator connection.
- Run underground copper lines in appropriate conduit. Use only code-approved pipes and fittings.
- Install an easily accessible propane supply shutoff valve.
- Pressure test all new propane lines and connections for any leaks and fix as needed.
Generator Setup and Connection
With your permits, fuel lines, and transfer switch installed, now the generator can be connected and prepared for operation:
- Carefully unpack and move the generator to its prepared mounting pad site.
- Connect and secure propane or natural gas lines according to fuel type.
- Connect transfer switch wiring from the generator to the transfer switch. Double check terminals are tight and secure.
- Add generator-supplied fluids – engine oil, coolant, etc.
- Consult manual for any other manufacturer setup steps.
- Do NOT connect battery until ready to test.
Also read : Portable Generators – Can They Power Your Home?
Testing and Operation
The final critical steps are testing generator operation and learning how to operate it safely:
- Review generator manual for all safety warnings and procedures.
- Connect battery and ensure generator is in the OFF position.
- Start generator and let engine stabilize for a few minutes.
- Switch on appliances and devices per loading instructions. Monitor voltage and frequency meters.
- Operate generator for 30-60 minutes under 50-75% of rated load. Check for leaks, odd noises, smooth operation.
- Manually test transfer switch by switching power back to utility, then back to generator. ATS systems will auto-test when utility power is lost.
- Shut down generator properly per instructions when testing complete.
Safety Precautions
When installing and using a generator, it is important to follow all safety precautions.
Here are some safety tips:
- Always operate the generator outdoors.
- Never operate the generator in a wet or enclosed area.
- Keep the generator away from flammable materials.
- Be aware of the carbon monoxide hazard. Carbon monoxide is a colorless, odorless gas that can be fatal. Never operate a generator in an enclosed area.
- Install a carbon monoxide detector in your home.
Conclusion
With careful planning, attention to safety, and adherence to local codes, installing your own home backup generator is an achievable and satisfying DIY project that gives peace of mind against power outages. Take time to thoroughly research and prepare in advance, obtain all necessary permits, and use extreme caution when working with electrical components and fuel systems.